Drinking Tube Clip
|
|
Mike Buckley - October 2015 |
Fed up with your Platypus' tube clip getting rusty or
falling off and getting lost? Irritated that you've lost the neat clip
for your Kokatat Tributary Hydration System? Found that all the fancy
tube traps intended to be used with military kit aren't wide enough
for the shoulder straps on your buoyancy aid?
Here's a simple DIY replacement / alternative. Which might
even hold the tube more firmly as well.
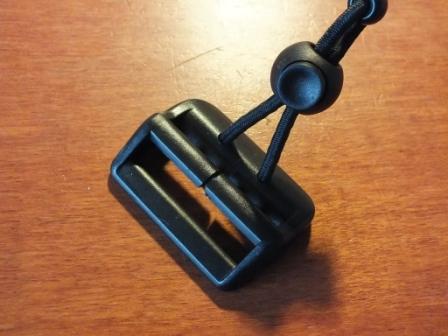
You need:
1 strap adjustment buckle. (Also called a ladderlock).
The one shown was taken from an old Palm BA.
1 spring loaded cord lock.
1 small bead.
4 mm bungee cord.
Being a bit of a squirrel, all these bits came from various
old jackets, rucksacs and BAs. But of course are available from eBay
and suppliers like PointNorth.co.uk
and Ace
Supplies. I've never found an on-line source for the beads, except
by the hundred, but most towns will have a "bead shop" where
you can buy them in small quantities. A search on eBay for "ranger
beads" will provide you with 13 on a length of paracord, and they
are ideal.
|
|
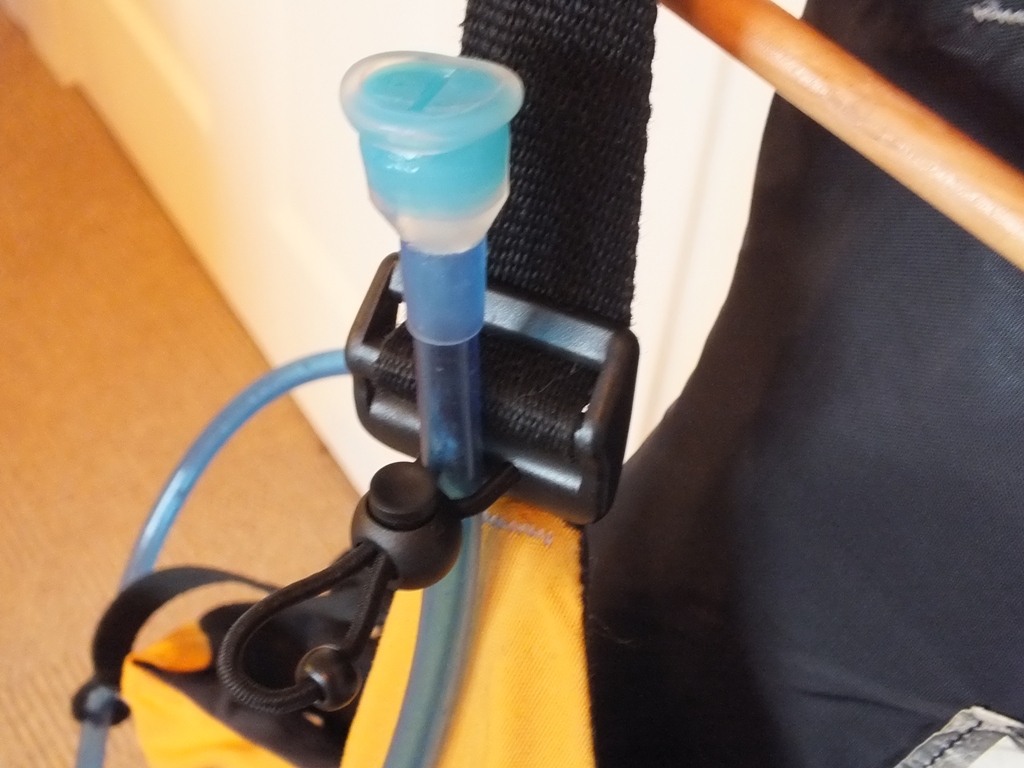
| Here's the finished
article - sits nicely on the BA strap and can be positioned higher
or lower to suit where's best for you. To keep the tube in place
beside my body, I've added a small loop of cord to the side straps
of the BA. The tube is passed through it and then up to the tube
clip. The bead is just to stop the bungee pulling through the
cord lock. A knot will work too, but isn't as neat. Alternatively,
use a double-hole cord-lock.
|
|
|
|
|
Cut the middle cross bar of the buckle - I used a fret saw
- open it up with a nail file or sandpaper to about 1mm to make
it easier to get the BA strap though it. Chamfering the cut
ends will help too.
Drill two 4mm holes about 1.5 cm apart in the curved bit of
the buckle. Insert bungee, and knot it tightly. Feed the bungee
through the cord lock, through the bead and back through the
cord lock and then into the second hole you drilled in the buckle.
Adjust to suit. Tie off. Trim the ends of the bungee and heat
seal with a hot knife or lighter.
Now slip the assembly onto your BA strap - this might be a
little fiddly, but it will go on, eventually. If necessary,
widen the cut a little. Since this one was made, I've made a
few more and found that some straps seem to be stiffer than
others, so a slightly wider gap than shown here may be better.
Cutting the slot at a 45 degree angle would also help and I'll
do this on any others I make.
|
For more DIY's, see the DIY,
Boat & Kit Repairs, Maintenance & Modifications page of
the Almanac.
© Mike Buckley - Oct 2015
Note: Do feel free to use my design for your own personal
use. If you want to copy it to make money, perhaps you'd be kind enough
to do the decent thing and
ask me first so we can agree on how much of a donation you're going
to make to RNLI on your sales profits from stealing someone else's idea.
|