|
|
Mike Wood - December 2004
(All pics © Mike Wood)
With the “real thing” costing up to £100, and with annual use to cross no more than 500 metres of soft sand, I thought that a bit of work with an angle grinder would transform an old golf trolley into a passable replica of the nifty bits of engineering that were on show at Perth a few weeks ago.
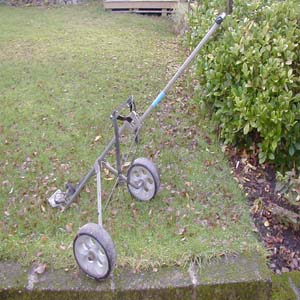
The golf trolley was donated by a friend. Luckily I live in Scotland, where
almost everybody plays the dreadful game! The tyres were knackered, which was
the only reason he chucked it out - apparently a new set of tyres cost more
than the trolley, and, being a Scot, he “retired” it. As you can
see, it folds up quite neatly (if you’re putting it in a Volvo), but the
possibilities are obvious.
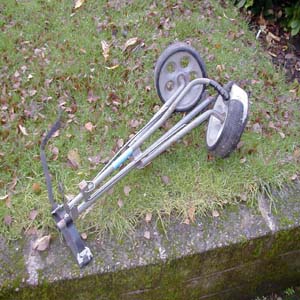
The first cut....
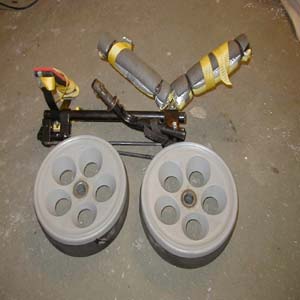
Out with the cutting tools, then, and off with the handle and the bit that reaches to the ground to hold the back of the bag. I was left with the bit in the middle, which consists of 2 folding legs with wheels, the “spine” with a bracket for the legs, a cradle, 2 bracing rods and the mechanism that locks it all together. The tyres were, as you can see, a bit beyond redemption, so they came off as well.
Support Vee
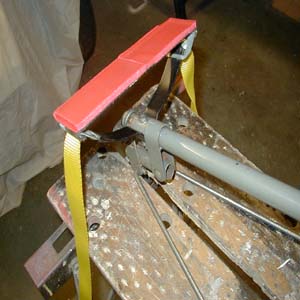
The “bit that reaches to the ground” has a V-shaped bracket on it that secures the golf bag. Cut the bracket off the tube. This is now drilled in the centre and a corresponding hole drilled in the bracket that holds the ends of the wheel “legs”.
A “whizzpin” holds the whole lot together and won’t fall out. It does have some “flex” however - if you don’t like that, and don’t need to dismantle this part to stow it, you might prefer to bolt it loosely enough to allow it to swivel for easier stowage - a spring washer would help here. Two bits of the discarded handle were crushed in the vise enough to slip over the ends of the V-bracket. These were hammered on tight and wrapped with foam padding. Pipe insulation works well enough. A luggage strap was passed through the whole lot - do this before finally force-fitting the pipes to the bracket. This is the “rear end” or main support “Vee” complete.
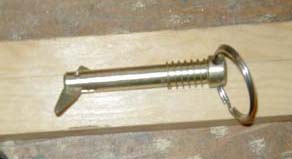 |
| These are called "whizzpins" in my business,
The Whizzpins are an unusual item, but can be sourced from Light Aerospares (www.LightAero.co.uk) but be warned - they ain’t cheap. |
Front Cradle.
The front cradle was left almost untouched. I wanted to use wider straps than it was designed for, so widened the slots in the brackets using a Dremel cutter, although a file would do the job - eventually. The webbing cushion strap that runs between the brackets was padded using bits of old closed cell foam sleeping mat, glued on. Similar luggage straps as used on the Vee were passed through the slots. This is the “front end” bracket complete, and serves to prevent the front of the trolley from contacting the hull, as well as steadying the whole trolley fore-and-aft.
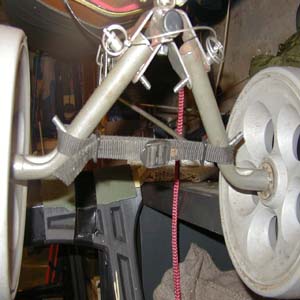
Anti-Spreading Strap.
The geometry of the original trolley was designed to carry about 25kgs (in my bit of Scotland this equates to 3 clubs, 2 secondhand balls and several cases of McEwans). To avoid the legs doing the splits, I used one of the original straps, taken around and under the ends of the bracing rods and pulled tight.
This makes a flexible “tie-bar” that keeps everything in the right place but doesn’t get in the way when folding.
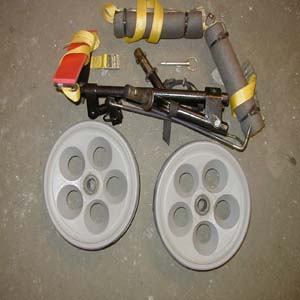
Essentially, that’s as far as you might want to go. I took things several stages further because the original legs were a little long. This raises the C of G enough to make the trolley/kayak combo a little unstable if moving over steep and/or very rough surfaces/boulders/beach litter/beer cans. You may prefer to shorten the legs by 6” or so, which I did, and is the set-up seen below
This also means cutting the bracing rods and reforming the bend that holds them into the legs. Take care with this, ‘coz if you get the length wrong the wheels won’t be square to the kayak centreline and it’ll be harder to pull (not to mention wearing out the centres of the plastic wheels). I cut the legs off at the “top”, so leaving the holes in the right place for the bracing rods. You will need to drill new holes to reattach the legs to the Support Vee using suitable bolts. I used 2 Whizzpins to hold the legs in position, and those with storage problems might want to keep this arrangement to allow the legs to be quickly removed - tie the pins to something though...
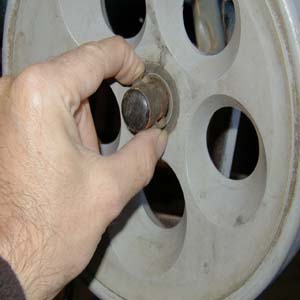
The wheels are removable using the neat “squeeze-release” lugs on
the axle - this was the main reason that I used this particular trolley. You
may find that your wheels have worn a bit and wobble on the axle - a bit of
Teflon tape wrapped around the axle will take up the slack and can be replaced
as it slowly wears out. Don’t use grease - it’ll pick up sand and
wear out even quicker. Having failed to confirm the price of new tyres (nobody
seems to sell ‘em), I fixed 2 strips of 2mm rubber around the wheels with
double sided carpet tape. It’s only there to reduce wear on the plastic
wheel rims and make it a bit quieter to use. If you’re going to use the
rig on really soft ground, you might think about fixing a wider “tyre”
made of some suitable flexible material - steamed marine ply might do the job.
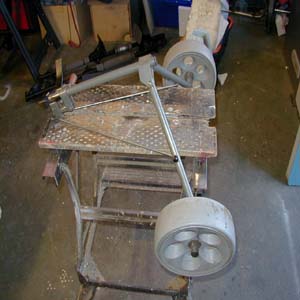
Folding
The rest is just cosmetic really. I gave all the metal a good coat of Hammerite to defend against salt water, and sprayed all the bearing surfaces with WD40. As you can see from the photos, once the wheels are removed the level of “breakdown” that you need to go to will be decided by the size of your hatch.
 |
 |
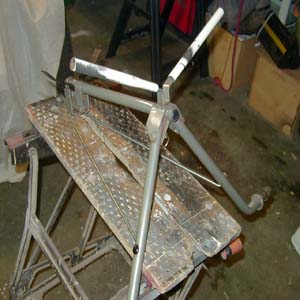
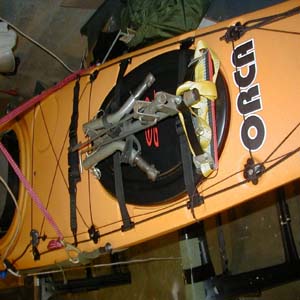
The basic folded frame will sit neatly on top of the rear deck, but with the Vee cradle removed and legs uncoupled from the bracing rods, it will fit through a 6” hatch, but the wheels won’t - but they do float.
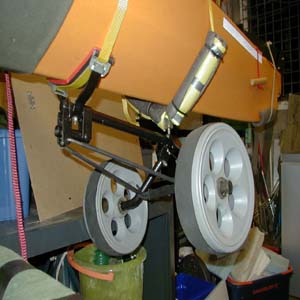
The trolley is designed to sit under the rear hull, and you will have to adjust
the angle of the Vee support to conform to the contours of your boat. That’s
it! Apart from the initial unseemly grovelling to obtain the timex-ed trolley,
it cost me absolutely nothing - all the bits came from the shed.
For those who haven’t accumulated a garage full of bits and pieces like me, you’ll find most of the extra components in your local DIY superstore. The Whizzpins are an unusual item, but can be sourced from Light Aerospares (www.LightAero.co.uk) but be warned - they ain’t cheap. If I find a cheap source for tyres, I’ll post at a later stage - or if anyone out there knows I’d be grateful.
Mike Wood - December 2004
(Editors note: The "whizzpins" Mike uses (or something similar) are also used by Kari-Tec for their kayak loader - they might be prepared to sell them separately?)